Paver Maintenance and Remedies
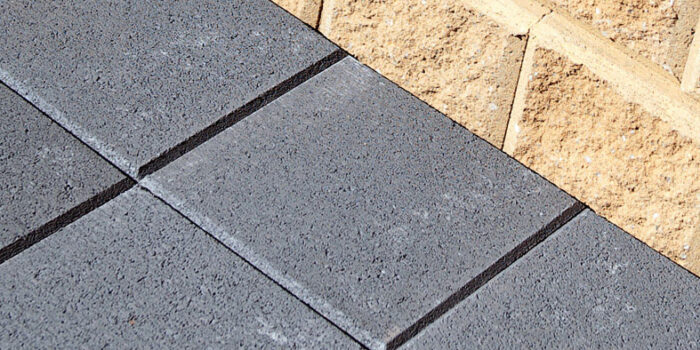
Once your pavers have been laid, here are a few tips to keeping your new addition looking like the day it went down.
Cleaning
Washing down the pavers with a hose or a high pressure domestic cleaner is not recommended until the pavers have settled and the grout sand has set between the paving joints. The best type of sand to use between the joints is a dried sand or a polymeric sand best known as Pave Set or similar. This is sold at most of the Australian Paving Centre stores.
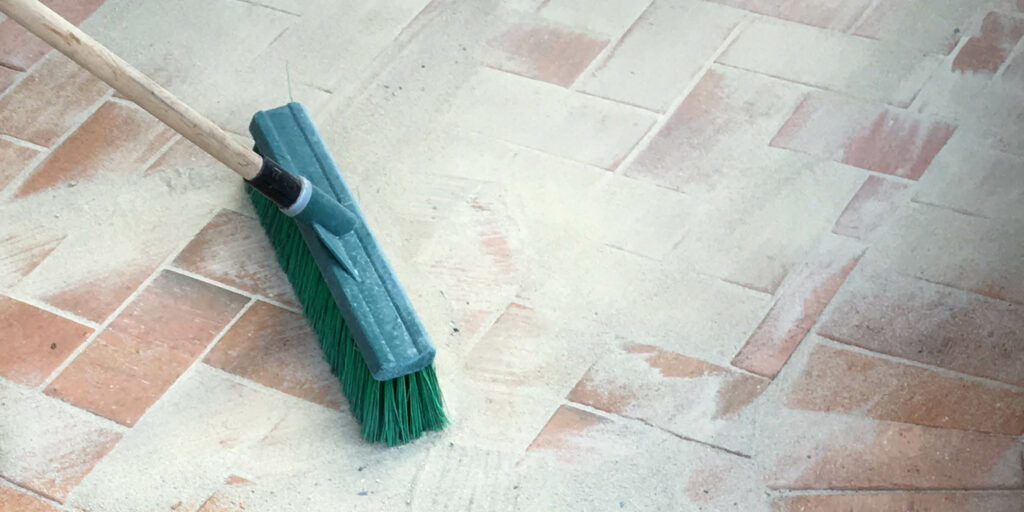
During the settling in period sweep only with a stiff outdoor broom or use a garden blower. When using the blower don’t blow it straight in to the paving joints, use it at an angle so as to not blow any joint sand out.
Frequent sweeping and occasional washing reduces the effect of dirt and grime and maintains the attractiveness of a paved area.
General Maintenance
During the initial settling in period & ongoing, keep a bag of dried sand or polymeric sand on hand, to top up any paving joints that may need a little extra between the joints.
When you poison the weeds in the garden do the same to any weeds in the paving. The polymeric sand is better, to stop weed growth.
Poison any paving areas that do not get a lot of sunlight or are prone to be moist, damp or cold as these areas tend to promote the growth of fungus & mould.
If you are pulling any weeds out of the pavers try to get to them before they grow too big. If they are allowed to grow too large as you pull them out it will take the gap sand with the root system.
Preventative spot spraying of the pavers, whilst you are doing the garden is the best way to keep the paving free of weeds.
Tip; when doing the pavers & you have a garden wall or retaining wall, spray the face of the blocks every now and then to prevent mould or fungal growth.
After the pavers have been down for some time, there is nothing wrong with giving them a pressure clean every now & then. DO NOT use a commercial pressure cleaner as this may pit the surface of the pavers, dependent upon the type of paver they are. Use a domestic pressure cleaner of about 1500 psi or less.
If you do pressure clean the paving you must top up the sand in the joints. When using a polymeric sand such as Paveset, read the instructions on how to apply it. Do not over fill the joints when using this type of joint sand. APC have a separate DIY Paving document which explains how to apply this type of joint sand.
Tips to Maintaining Your Pavers
- Do not allow moss, weeds or algae to develop on the paved surfaces. It is important to keep driveway surfaces clean and clear. Use standard herbicides on these surfaces.
- Regularly sweep or clean the pavers with a stiff outdoor broom or garden blower
- Occasionally pressure clean your driveway to remove stubborn dirt
- Top up the joint sand when required
- Always maintain good drainage away from the paving & ensure your storm water drains are clean & running water freely away from the paved area.
Common Stains and Stain Removal
The removal of stains is not always easy, but by following these basic principles it can be made a bit easier:
- First, determine if the use of chemicals are necessary. If dry sweeping or washing or scrubbing with clean soapy water or detergent fails to bring the paved area to an acceptable state of cleanliness, then you should at least consider it.
- Rather than automatically using an acid cleaner such as spirits of salts (hydrochloric acid), it is essential to first identify the substance to be removed.
- Follow the correct cleaning procedures: Always test the chemical on a small, inconspicuous patch before tackling the whole paved area. By testing first, it will ensure that no extensive chemical damage is done to the area from using an inappropriate substance.
- Safety precautions are essential. There are few chemicals that are entirely safe and some may be potentially dangerous. A few elementary precautions are necessary to ensure that no harm is done to yourself and those around you.
- Protect yourself against inhaling the fumes and against acid burns on your skin or in your eyes.
- Wear protective clothing.
- Dilute acids in the open with the breeze behind you.
- Always add acid to water and never add water to acid. This is absolutely vital.
- Whilst working with these chemicals keep people (especially children) and animals out of the area. Upon completion ensure the chemicals are safely stored.
Efflorescence
Efflorescence is a white powdery deposit or residue that forms when moisture from within the masonry product dries out or evaporates leaving behind a white salty deposit.
Although efflorescence looks unsightly and aesthetically displeasing it does not affect the product if dealt with quickly and correctly. Efflorescence may generally disappear over time.
The process can be accelerated by dry brushing off any residue and removing it from the surface of the pavers. This can be done by sweeping with a stiff broom, using an outdoor vacuum cleaner and by scrubbing with a brush and clean soapy water.
Sometimes it is necessary to follow this up with a wash of weak acid (hydrochloric acid 1 part acid to 15 parts water ratio) or use a cleaner commonly called “Anti Eff”.
If using acid always add acid to water and never add water to acid. This is absolutely vital.
Always test an area or paver first either using a spare paver or testing the process on an inconspicuous area.
If the salts are not removed from the site they will just be reabsorbed into the masonry product when washed down. Repeat the process until the problem has stopped.
Efflorescence may mean there is:
- Presence of soluble salts
- Excessive amounts of water entering the masonry
Soluble salts can be introduced to your masonry product in a number of different ways. They can be found externally in the fill, soil or sand surrounding the product or brought in by the environment such as sea spray. Occasionally the soluble salts can be found in mortar, grout, dried sweeping sand and even the masonry units themselves.
It is always recommended that a good quality washed bedding sand be used under your pavers to help minimize the presence of soluble salts. As the name suggests, washed sand has been washed to remove a lot of the finer material, which also removes any of the salts that may be present.
Dirt and Grime
Dirt and Grime can discolor the pavers no matter what material they made of. Frequent sweeping and occasional washing reduces the effect of dirt and grime and maintains the color and freshness of a paved area.
Fresh Mortar Stains
The simplest way to remove wet mortar stains is to lightly cover the pavement before the mortar sets hard, with clean but slightly damp washed sand. Sweep the sand towards the edges of the pavement. If necessary continue to repeat this until the surface is almost clean. The most important point to remember is that the sand must be free of clay.
Follow this up with a further sweep with a dry washed sand. Any sticky wet mortar residues that escaped the wet sanding will be removed. Once again, the sand must be free of clay.
One or two days after the pavement has dried, some mortar residues may still be visible as a faint white mark. Normally this will weather away.
Dried Mortar Stains
Experiment on a small section of the pavement with decreasing proportions of water mixed with acid, starting with one part acid to ten parts water (remembering to pour the acid into the water, not the other way around).
Once you have determined the appropriate proportion of acid to water, or the type of proprietary cleaning solution needed, proceed as follows:
- Slightly wet the pavement with a fine spray of water.
- Using a stiff brush, apply the acid mixture over the areas stained with mortar. Loosen thick mortar patches with a hard implement such a steel scraper. Work on the mortar stain until it is dissolved.
- Give the area a good hose down.
- Repeat steps one to three until the whole pavement has been cleaned.
- A final rinsing of the pavement with a domestic pressure cleaner is often beneficial. However, many pavers can be damaged by the over use of high-pressure water jets so check with APC before commencing. Take care not to remove sand from the paver joints.
Fungi, Moss and Lichens
These are common, particularly in shady or damp parts of the pavement. They sometimes appear as localised dark stains or patches of green, giving a dirty and unsightly appearance. These growths will not damage the pavement but will cause it to become quite slippery.
To remove these growths, vigorously brush the affected area when it is dry. Domestic pressure cleaners may also be used. While the surface may now appear to be completely cleaned it is important to sterilise the area with a poison or strong fungicide, which should be allowed three or four days to act. Blue crystals (copper sulphate) is one such poison, whilst Hypochloride (liquid chlorine, White King) and formaldehyde are fungicides. Other proprietary brands are available from plant nurseries. The surface should be brushed again when it is dry.
You can also pour boiling water on moss and lichens to kill them and clean the pavement.
Please note: Some of the poisons and fungicides may discolour the pavement. Check their effect on a small part of the pavement before proceeding to clean the entire area. Pay attention to nearby garden plants or lawn, especially on the lower side of the area being treated.
Chlorine is another way to bleach out & remove these stains. Applying Chlorine with a garden sprayer is one option & this particularly works well removing stubborn fungal stains. Thoroughly wash off the chlorine afterwards with clean water.
Tannin Stains
Tannin from gum leaves or bark is particularly hard to remove. Once again Chlorine will remove these stains but test a spare paver or test it in an inconspicuous area first of all. Chlorine is a bleach therefore it may discolour the paver so a test is imperative & leave the paver to stand for a duration of time to ensure it does not bleach out the colour. Lighter coloured pavers are less likely to be affected than darker colours.
Oil or Grease Stains
Coca-Cola has been used with great success. Tip the Coke on to the affected paving & leave it for a duration of time & then wash off. Repeat this process until it removes all of the stains.
Sealing the Pavers
The most effective way to keep paving clean is to use a sealer. There are a number of good quality sealers available which have a life span of 8 – 12 years.
Sealing the pavers as soon as possible after the project is done is the most ideal situation, however we have cleaned and sealed pavers up to 10 years old with brilliant results that make them look as good as new.
There are several types available and your local APC store can advise the best and most suitable sealers to suit the paving product.
Sealing pavers assist in the protection of pavers from the damage it faces from weathering, grime, mould, dirt, oil and other substances like red wine!
Paver sealers help to repel particles that may stain the paving surface. Certain penetrating paver sealers also help to prevent and eliminate corrosion or salt attack.
However, sealers are not only used because of the durability it provides but some can also enhance the appearance in colour, texture and design.
The colour of pavers and its surface texture can also be enhanced using some sealers whilst other sealers offer a natural unaltered appearance to your paver.
The natural penetrating sealers will only be detectable once you pour liquid on to the surface of the paver. For example, you will see water bead on the surface of the paver.
Natural Finish
For a natural type of sealer that does not alter the appearance of the paver, we recommend ‘Natural Sealer’. It is a clear solvent based sealer which penetrates deep into the paver, forming a weather and chemical barrier without changing the appearance.
It is a quick acting sealer (will repel water in 2 hours) that is long lasting that will not darken or yellow with age. It can also be re-coated at any time.
Apply to concrete, bricks, stone, porous unglazed tiles and masonry surfaces.
This sealer can also be used for any block walls and can be applied with a low pressure spray.
Micro Seal
A clear penetrating sealer that is designed to protect polished porcelain, stoneware, marble, granite and unpolished natural stone.
A long lasting sealer that provides years of protection that is quick acting (will repel water in 2-4 hours). It will not darken or yellow with age and can be re-coated at any time. This sealer helps to reduce permeability of stains, oils etc to the surface. We recommend immediate removal of any spillage and cleaning which will minimise staining.
Revive and Seal
A solvent based sealer that penetrates porous surfaces and highlights the colour with a matt finish.
This sealer can be used on interior or exterior surfaces on unsealed porous stone, tiles, grout, concrete, pavers, brick and mortar – the colour in the surfaces will be highlighted and sealed. A long lasting sealer that provides years of protection and UV resistant. It requires a longer cure time of 24 – 72 hours (temperature and humidity dependent) and the surface can be walked on in 6-8 hours.
Kemcote Gloss
A clear sealer that provides a ‘wet look’ that is hard-wearing and non-yellowing. It will highlight colours and seals and protects porous, internal surfaces and slate.
This sealer cannot be used on terracotta, pavers, around swimming pools and spas and areas subject to continuous moisture. Use on architectural features and porous flooring stone, slate, brick and concrete surfaces. A long lasting sealer that provides years of protection that will not darken or yellow with age and can be re-coated at any time.
Paver sealers are particularly popular for pool pavers that are exposed to salt chlorinated chemicals – however it is vital to use the right pool sealer for the pavers you have selected. Sealing pavers is also a great solution in having your old, weathered existing paving restored and looking beautiful.
For more information about sealing pavers, visit our Knowledge Centre or visit your local APC store and talk with our expert staff to find the best and most suitable sealer for your paver.
Visit us at APC to pick up a free sample!
Or, send us a product enquiry or request a quote online
